Hello everyone,
Below is a quick recap of the cards we made in class last week. FYI, the PVPUSD Winter 2024 class schedule is now posted online.
Enjoy a safe and happy holiday season with your family and friends! See you all in 2024.
Take care,
Connie
 |
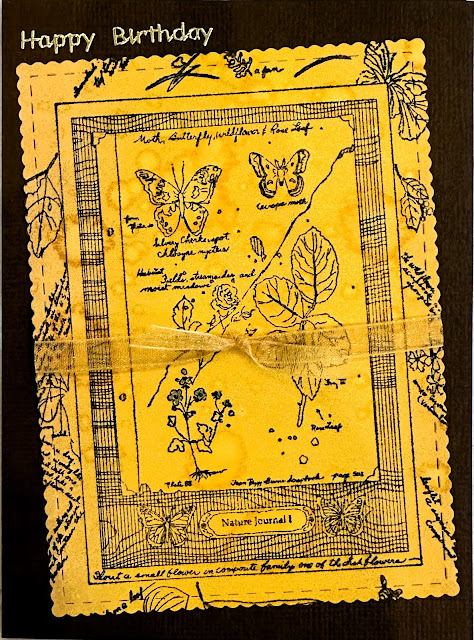
Butterflies Floral Birthday: Brayer Tea Dye, Wild Honey & Vintage Photo to pick up the 1st print. Roll remaining ink on brayer onto gel plate, spritz or sprinkle some water drops on gel plate and replace the 1st print onto gel plate to pick up the water distress look. Stamp image with black ink onto background print. Use scallop rectangle stitch die to cut out shape. Add ribbon and sentiment sticker and adhere on brown card base to finish card as shown.
|
 |
| Butterflies Floral Birthday: Paint image with H2O colors as an option to add more interest. |
 |
Embossed Pine Cones: Emboss ivory card panel with Alternew Pine Cone 3D Embossing Folder. Brayer some Mowed Lawn or Peeled Paint Distress ink on gel plate. Place embossed panel onto gel plate and lightly rub the embossed image to pick up ink. Use another brayer to apply darker color ink (Pine Needles or Forest Moss) to create another layer of dimension. Add twine and stamped sentiment before adhering onto gold mat and ivory card base to finish card as shown.
|
 |
| Warmed Wishes Poinsettia: Emboss white card panel with Alternew Poinsettia 3D Embossing Folder. Brayer Abandoned Coral Distress Oxide ink onto gel plate. Place embossed white card panel onto gel plate and lightly rub the embossed image to pick up ink onto embossed white card panel. Lift off card panel and place another white sheet of paper to pick up the ghost image left behind for the green card below. (Roll remaining ink on brayer onto gel plate and replace the previously inked embossed image onto gel plate to obtain a darker color. Add ribbon and stamped sentiment before adhering to red card base to finish card as shown) |
 |
Happy Birthday Poinsettia: Use the ghost print lifted from the previous card (above), die cut shape and place into the same poinsettia 3D embossing folder, lining up the image of the print with the embossing folder to emboss image. Adhere to green card base, add twine and sentiment sticker to finish card.
|


No comments:
Post a Comment
Please leave a message for me and let me know what you think!