Thursday, February 29, 2024

Winter 2024 - Handmade Greeting Cards Workshop, February 21 & 24, 2024

Hello everyone,

Hope you are doing well. 

Below is a brief recap of the cards we made in class. Our next class meeting will be on Wednesday March 6 and Saturday March 9. See you then.

Take care,

Connie

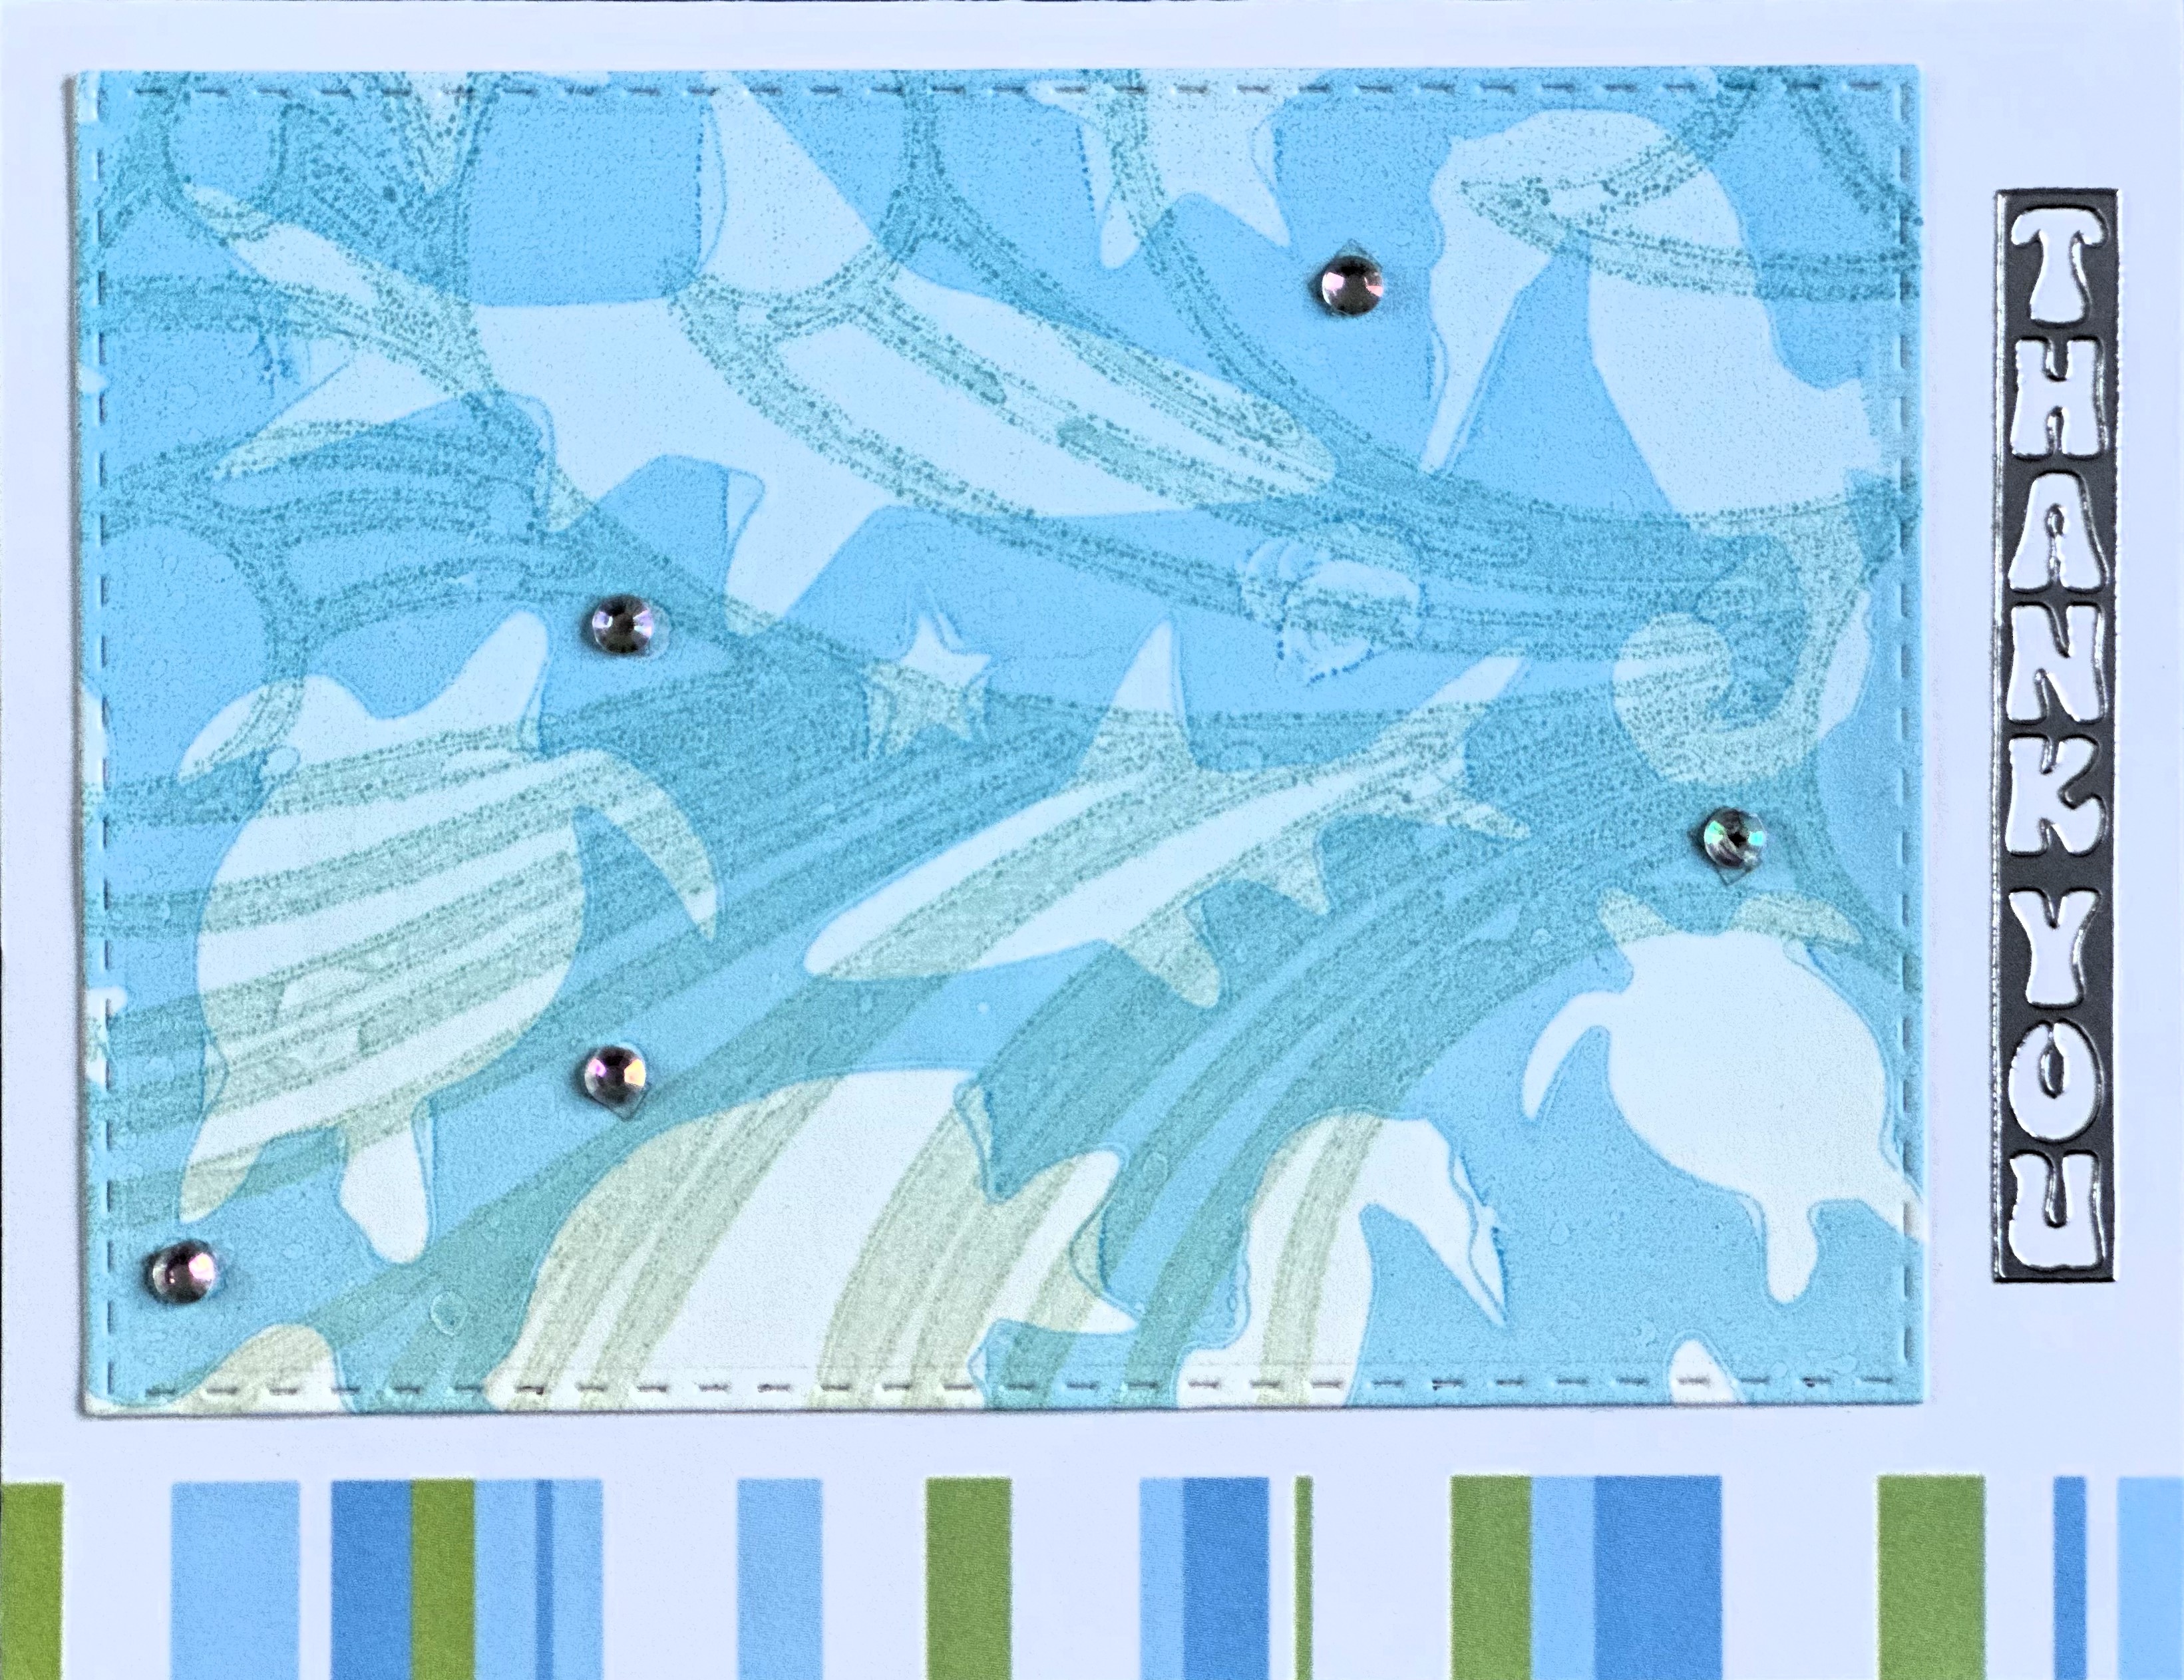
Sabastian Seahorse: Spray some Distress Mica Stain colors (Snow Flurries, Merry Mint & Wonderland) onto non-stick mat and spray some water to dilute the colors. Place the mixed media card panel to pick up the colors. Use a dryer to dry and set the colors, and pick up additional colors as needed. Dry card panel well and stamp seahorse with Nocturne Versafine Clair ink, add clear embossing powder and heat emboss image. Die cut with stitch frame die and assemble card with sentiment as shown.

Turtle Iris Folding: Follow the Turtle Iris Folding pattern, use two different color/pattern papers (odds with blue floral and even with the wavy pattern) to complete this card.

St. Patrick Shamrock: Die cut shamrock on green card panel and stamp shamrock leaves using clea Versamark ink. Assemble the gold shaker panel by wrapping some cellophane sheet to make a pouch, put some confetti in and seal the package. Adhere it to the back of the green panel. Glue the die cut shamrock leaf onto the opening. Add ribbon and sentiment to finish card as shown.

Red Roses: Place and secure rose stencils onto cream card panel. Use Memento ink pads (Rose Buds, Rhubarb Stalk, Bamboo Leaves and Cottage Ivy) to sponge colors accordingly. Die cut card panel and add sentiment and ribbon to finish card as shown.


Tuesday, February 27, 2024

Winter 2024 - Gel Press Monoprinting Class, February 14, 2024

Hello everyone,

Hope you are doing well. Below is a quick recap of the cards we made in our previous class.

Have a great day and see you in class.

Take care,

Connie

Aqua Blue Sea Creatures: Brayer some phthalo blue with turquoise iridescent acrylic paints evenly on gel plate, and stamp octopus, fish and turtle. The stamps lift the paint and left the images on the gel plate. Place paper over gel plate and rub all over thoroughly to pick up the print. Die cut shape and assemble card with blue polka dots washi paper, sequins, beads and sentiment as shown.

Green Zebra: Brayer some sap green and green iridescent acrylic paints evenly on gel plate. Place some leaves on top and place paper over everything and rub throughout. Gently lift up one side while holding on to the other side; carefully remove the leaves one at a time and lay the paper back down to pick up the leave imprints left behind. Clean plate and brayer a thin layer of gold transparent paint on gel plate. Place the previously lifted green leaves print back on to add the gold sheen onto background. Die cut shape and add zebra die cut and sentiment to finish card as shown.

Embossed Pink Petals: Brayer some gentle heather and magenta iridescent acrylic paints evenly onto gel plate. Place the debossed side of the 3D embossed panel onto gel plate. Place paper on top to lift background. Die cut shape and place cut background in 3D embossing folder to match image and run through machine to emboss. Add twine, gems and sentiment to finish card as shown.

Magenta Dragonflies: Brayer some magenta, violet with violet iridescent acrylic paints evenly onto gel plate. Stamp dragonflies and vines. The stamps lift the paint and left the images on the gel plate. Place paper over gel plate and rub all over thoroughly to pick up the print. Die cut shape and assemble card with gem, bow and sentiment as shown.


Tuesday, February 13, 2024

Winter 2024 - Handmade Greeting Cards Workshop, February 7 & 10, 2024

Hello everyone,

Hope you are enjoying the wonderful sunny day we had today.

Below is a quick recap of the cards we made.

Begonias Birthday: Emboss white card panel with Alternew 3D Begonia embossing folder. Use sponge daubers to color the flowers using Mustard Seed, Picked Raspberry and Twisted Citron distress inks for the flowers and leaves on the "deboss/sunken" side. Go over the outside edges and the spaces in between with Fired Brick distress ink to add more definition to the overall picture. Add ribbon, stamped sentiment and adhere to card base as shown.

Happy Everything: Apply alcohol inks onto silver shimmer Yupo paper. Using a stamping platform, stamp image with Alcohol Lift ink onto Yupo paper. Place paper towel over stamped image to soak up the inks from the Yupo paper to reveal the stamped image. Repeat applying Alcohol Lift ink and stamp as many time as necessary to get a clear image. (Remember to clean off stamp to remove the alcohol inks before applying the Alcohol Lift ink each time.)

Lighthouse: Apply shimmer inks onto acrylic block, add water to create a small puddle and slightly dunk watercolor paper over the puddle to pick up colors. Repeat as necessary to get enough coverage. Die cut the lighthouse using the shimmer card panel. Assemble the watercolor panel in the back of the frame and the lighthouse die cut. Add blue twine, sentiment and blue mat to finish card as shown.

Birthday Pansies: Adhere pansies sticker onto vellum. Color the back of the vellum with markers. Adhere the colored vellum to the back of the lavender card panel. Add ribbon and sentiment to finish card as shown.


Monday, February 5, 2024

Winter 2024 - Gel Press Monoprinting Class January 31, 2024

Hello everyone,

Hope you are staying safe and dry. Below is a quick recap of the cards we made in our previous class meeting.

Take care,

Connie

Stencil Emboss Flowers: Brayer two shades of purple Distress Oxide inks on gel plate and lift the print for background color. Brayer the darker purple color only and place swirls stencil on top gel plate. Keeping stencil on gel plate, place the background print on top and rub all over to add the swirls pattern onto the background print. Die cut with scallop stitch rectangle, stamp and heat emboss flowers with purple embossing powder. Adhere on white card base to finish.

Stencil Roses: Brayer Rose ink lightly over gel plate to lift background print. Brayer Port Red ink over gel plate, add rose stencil on top. Keeping the stencil on, place background print back on top and rub all over to pick up the rose images. Add ribbon, sentiment, butterfly. gems and adhere to red card base.

Stencil Sea Creatures: Brayer Antique Linen & Broken China Distress Oxide Ink onto gel plate, add wave stencil on top to lift the background print. Brayer Salty Ocean onto gel plate, add sea creature stencil, and place the background print back on to add the sea creature images onto background print. Die cut stitch rectangle, add stamp sentiment and twine and adhere to blue card base.

Sea Creatures Ghost Print: (Note: This card is made following the steps of the card above.) Remove wave stencil after lifting the background for the card above and place a clean white paper on top to pick up the image left on the gel plate (ghost print). Remove the sea creature stencil after lifting the print for the card above, and place the ghost background print back on to add the sea creature images left behind. Die cut stitch rectangle, add sentiment sticker and gems and adhere to white card base as shown.


Spring 2024 - Gel Printing Workshop

Hello everyone, It was so nice to welcome all my new and returning students to my Spring one-day gel printing workshop. Below is a quick rec...